A reliable microscope slide scanner workflow checks the glass slide before scanning, confirms that the digitized tissue is in focus and fully represented, and verifies that the resulting file can be opened by the intended review process. These checks help prevent avoidable rescans and make digital slides easier to hand off. They do not replace professional interpretation or any laboratory validation required for a specific use.
Quality control needs to be performed before a slide is scanned. Issues such as cleanliness, coverslip quality, adequate tissue thickness, proper scan settings, and handling of digital files can all be identified before the images are seen by the reviewer. A simple checklist can help distinguish between problems caused by the preparation of the slide and problems caused by the scanning process. These problems need to be addressed before the slides are processed further by the lab.
Prepare Slides Before Scanning
Check each slide for any obvious problems that could prevent loading or imaging. Ensure that the label is fixed securely and is clearly readable. Check that the coverslip is intact and that the glass surface of the slide is free from any dust, fingerprints, and other residue in the area to be scanned. Follow the laboratory’s handling and cleaning procedures – the scanner workflow should not introduce any unapproved treatment of the specimens.
Make sure the tissue is within the usable area of the slide and that the coverslip is not obstructing the area to be scanned. This includes issues such as folded tissue, trapped air, excess mounting medium, and sections which have been displaced. It is worth sorting out any preparation problems prior to scanning, when the laboratory’s process allows.
Match Slide Orientation and Identification
It is possible for a slide to be successfully scanned and subsequently cause problems down the line because it was associated with the wrong digital file. Make sure the slide is labeled correctly before loading it into the scanner, and that it is the correct orientation for the scanner holder. Use the established naming conventions and verification process of the laboratory, as opposed to developing a new system at the scanner.
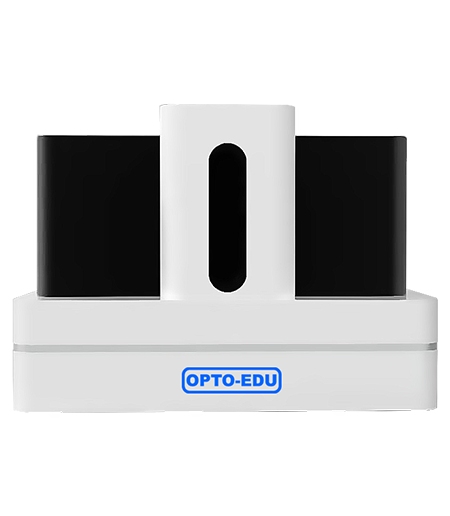
When a workflow includes different slide formats, group and load them according to the scanner’s documented holder requirements. The M30.5840 describes a specialized loading and unloading design intended to reduce the risk of sample damage during unattended operation. Even with automated handling, proper placement and a pre-scan check remain important.
Set Up a Scanning Job with the Review Task in Mind
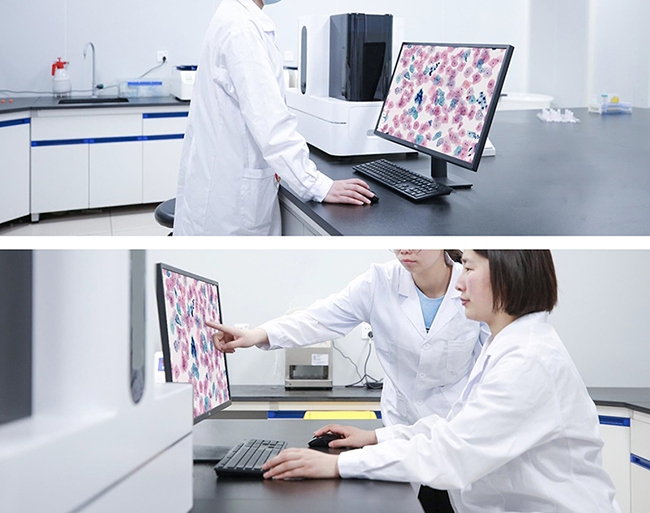
Set the requirements of your digital slide before you start to choose your scan settings. The broad review of a sample, for example, will require the tissue to be completely covered by the scan and for it to be possible to move around within the sample. For closer inspection of cells, etc., good optical detail is required. Note that the highest magnification is not always required and that large image files require a lot of storage and can lead to problems with transfer and review of the images.
For the OPTOEDU M30.5840, the product lists 20x as standard, with 40x APO objectives optionally available. The choice of objective depends on the specific application and the user’s laboratory workflow. In projects where different magnifications are employed, the chosen magnification must be clearly recorded for users to understand the difference in image detail and file size.
Set up a method to consistently select tissue areas and scan boundaries. Ensure all areas necessary for evaluation are scanned and only include additional blank glass if the system allows for region selection. A consistent rule ensures all tissue at edges of sections are evaluated and simplifies assessment of scan completeness.
Check Focus Across the Whole Tissue
Focus should be reviewed at several points across the image, not just the center. Because the thickness of the tissue and how it is mounted can vary greatly across a section, an image that looks good in some areas can get soft at edges or even fold in others. Pay particular attention to images with very dense tissue, very pale tissue, and sections with big changes in thickness.
Watch for parts of a specimen where the cellular detail appears to be getting fuzzy, where a focus transition through the tissue appears to be crossing a fold or otherwise to appear misleading. Note any areas that the scanner has flagged for focus or tissue-detection issues and review the area in question prior to deciding to re-scan. Make a distinction in your records between an optical focus problem and a specimen-prep artifact.
Determine in a practical test whether all necessary details of a slide are reproduced sufficiently for the intended inspection and not whether all parts of a slide are presented in equal quality on the monitor. Use the laboratory’s test criteria and relevant reference material. Refrain from making declarations about possible causes for observed phenomena by referring to the scanner’s specifications or by viewing the image on the monitor.
Confirm Tissue Coverage and Image Integrity
Review the digital slide at both the whole slide and higher magnification views. Verify that all necessary tissue is present and the scanned area has not been clipped at the overview magnification. Examine the higher magnification images for signs of stitching, unusual blank regions, and areas that have been duplicated or corrupted by image artifacts.
Check that digital files open, are able to be navigated, and are displayed at the correct scale using the software that has been used for the review. Even though SVS and JPG are both listed as supported file types on the M30.5840 product page, it is best to test transferring the file and then viewing it on the receiving system, as listed support does not necessarily equal 100% interoperability.
Plan Capacity Around Quality Control
Throughput planning should include time for preparation checks, loading, exception review, and file verification, not only the scanner’s nominal capacity. The OPTOEDU M30.5840 is listed as a 200-slide full-auto scanner, with continuous loading and unloading and an emergency slide-priority function. Those features can support larger batches, but they do not remove the need to check slide identity, scan quality, and file handoff.
Determine how to handle any exceptions that may occur prior to processing an unattended batch. Items such as a slide missing a label, a slide being loaded incorrectly, or a slide requiring to be processed as a higher priority sample must have a method to handle these situations without jeopardizing sample tracking. Automation of repeatable tasks and human review of decisions applied by the scanner via laboratory-defined rules for exceptions and for acceptance of scanned samples.
How an OPTOEDU Microscope Slide Scanner Fits Lab Workflows

M30 from OPTOEDU is offered in various models with different capacities. Herein we compare the OPTOEDU microscope slide scanner range with expected batch sizes, available space on the bench, types of slides to be read, and types of review that will be required. We see that the capacity of a model is only one of several key factors. Important also are the images that are generated, and the software used to review those images.
For larger unattended batches of slides, review the features of the OPTOEDU M30.5840 slide scanner such as the documented loading process, priority of slide types, and output file formats. For smaller batches of slides, compare other models on this site first and verify the holder capacity and workflow for each model on the relevant product page. Specifications of individual models do not necessarily transfer to other models within the M30 series.
Conclusion
A reliable workflow for digitizing microscope slides consists of several steps: preparation, scanning, focusing, checking coverage, verifying files, and handling exceptions. By documenting all these steps, it becomes much easier to identify problems and to share digital slides in a reliable fashion. OPTOEDU’s M30 series is available in different slide volumes, and our laboratory’s quality control is aligned with the automated review process.
Contact us to take a look at OPTOEDU M30.5840 for high-volume whole slide imaging.
FAQ
Q: What should be checked before scanning a microscope slide?
A: Check the slide label, glass surface, coverslip, cleanliness of the slide, orientation of the tissue in the holder, and compatibility of the slide with the holder. Verify the slide identity against the corresponding batch record. Any issues with sample preparation/identification must be addressed according to the established lab process before running an unattended scan.
Q: How do you check focus in whole slide imaging?
A: Review multiple representative tissue areas, including edges and regions with changes in thickness. Look for softened cellular detail, focus transitions, or artifacts around folds. Compare the result with the laboratory’s acceptance criteria and review any flagged location before deciding whether a rescan is necessary.
Q: Does a 200-slide scanner mean every batch can run unattended?
A: The capacity is indicated by the number of slides the setup is specified to process. However, other aspects, such as preparation of the slides, compatibility of the holders, loading of the slides, handling of exceptions, and file checks have to be taken care of by the laboratory. The laboratory should establish a monitoring and escalation procedure for its own workflow.
Q: Which file formats does the OPTOEDU M30.5840 support?
A: SVS and JPG are supported image formats according to M30.5840. Test how your viewing/data management software of choice opens a file of a particular format before you consider that format for regular use. Support for a particular image format on a product’s web page does not necessarily mean that all systems and workflows are going to work with it.